https://mega.nz/megadrop/sW3giATibUU
mega.nz | second accnt.


https://mega.nz/megadrop/sW3giATibUU
mega.nz | second accnt.
using GNU parallel. first create a file named (url.list) files must contain what all the files you want downloaded, then run command:
cat url.list | parallel -j 8 wget -O {#}.html {}
for using it this must have, moreutils and parallel.
$ sudo apt install moreutils
$ sudo apt install parallel
Thanks to
Nikolay Shmyrev from stackoverflow👍️
In my case I’m installing it on Linux Mint 19.1
Wine will be installed in /opt/wine-stable/ directory. After the installation is complete, we need to add /opt/wine-stable/bin/ to the user PATH. Run the following command to open the .profile file. Nano is a command line text editor. The ~ (tilde) represents your home directory.
Add the following line at the end of the file.
Install Wine on Linux
Next, run the following command to download and import the public key for the Wine repository.
Then, issue the following command to add Wine and libfaudio0 repository.
Update package repository cache and install Wine stable version.
Things to Do After Installing Wine
Before you download any Windows .exe file and use Wine to install Windows program, you need to run the Wine configuration program by issuing the following command in the terminal.
It will create a .wine directory, also known as wine prefix or wine bottle, under you home directory. The virtual C drive will be created in this directory. Also this command will help you install Wine mono and Wine gecko package.
How to boot a bare metal server on LAN! Nowadays is pretty uncommon to setup a workstation/laptop, and installing a Linux distro using a CD is even less frequent. Today we had to setup a workstation that we use to run some tests – we need a a bare metal server for these tests – and none of us had an USB stick, neither a DVD Writer 🙂
This step is easy: simply configure the workstation to boot from LAN!
We choose to install Ubuntu 18.04. Find the URL where to download the netboot iso. In our case, the URL is
http://archive.ubuntu.com/ubuntu/dists/bionic-updates/main/installer-amd64/current/images/netboot/ and the image name is netboot.tar.gz
The image must be uploaded in pfSense.
Download the tar archive and uncompress it locally, now you have to copy the contents o the tar archive in the root of yout tftp server. A simple way is to SSH in the pfSense box and to download and extract the tar archive directly in the /tftpboot directory.
Set in the DHCP options the TFTP server and the image to use to boot theservers. Select Services -> DHCP
Server and scroll at the bottom of the page.
Set the following configurations:
Conclusions
That’s it! Now boot your workstation, and install the operating system!
First get rid of the old package
sudo apt purge ttf-mscorefonts-installer.
Download the current 3.8 version (as of year 2020)
wget http://ftp.de.debian.org/debian/pool/contrib/m/msttcorefonts/ttf-mscorefonts-installer_3.8_all.deb -P ~/Downloads
Install the new package.
sudo apt install ~/Downloads/ttf-mscorefonts-installer_3.8_all.deb
Install Fonts
Download desired fonts
https://fonts.google.com/?selection.family=Open+Sans
Install Google Fonts on Ubuntu
cd /usr/share/fonts
sudo mkdir googlefonts
cd googlefonts
sudo unzip -d . ~/Downloads/Open_Sans.zip
sudo chmod -R --reference=/usr/share/fonts/opentype /usr/share/fonts/googlefonts
Register fonts
sudo fc-cache -fv
Check if font installed
fc-match OpenSans
You can also install some of these fonts (My Favorite Roboto) as packages on newer ubuntu 18.04 +
sudo apt install fonts-lato fonts-open-sans fonts-roboto fonts-mononoki
 EXAMPLE:
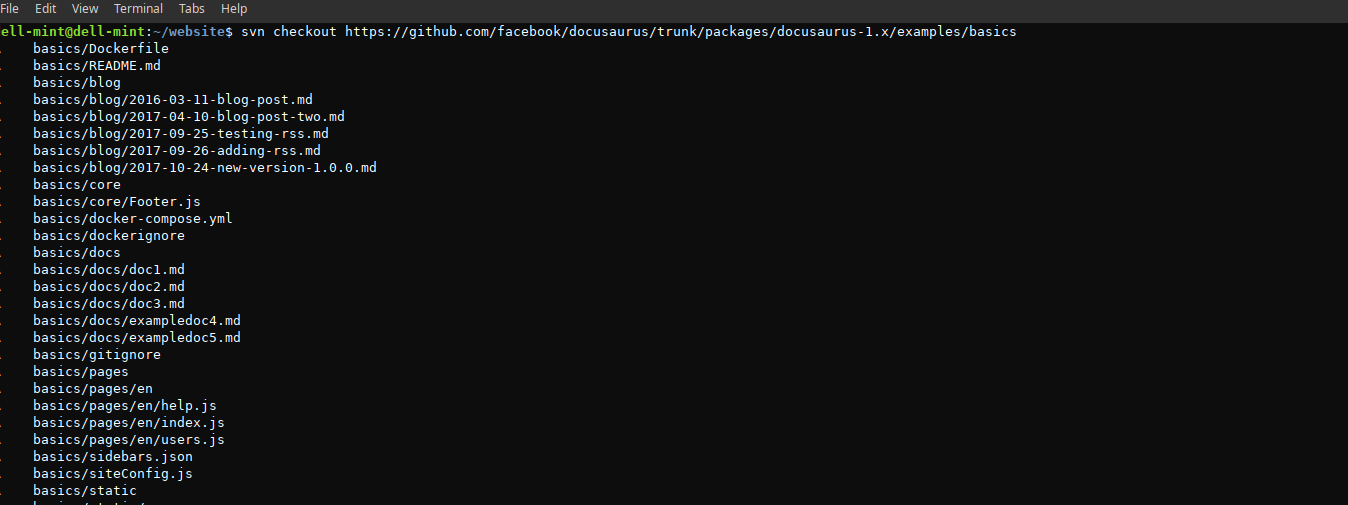
https://github.com/facebook/docusaurus/tree/master/packages/docusaurus-1.x/examples/basics
#Modify the URL for subversion. Replace tree/master with trunk.
$ svn checkout https://github.com/facebook/docusaurus/trunk/packages/docusaurus-1.x/examples/basics
ffmpeg -ss 00:00:03 -t 00:00:08 -i movie.mp4 -acodec copy -vcodec copy -async 1 cut.mp4
./ffmpeg -ss 00:39:05 -i input.mkv -codec copy -t 00:03:03 out.mkv
./ffmpeg -ss 00:00:07 -i input.mkv -codec copy -t 00:02:53 out.mkv
$ scp -p FILE.zip USER@192.x.x.x:access_media/

#Copy files inside directory recursively
#“-r”
$ scp -p -r DIR/ USER@192.x.x.x:access_media/

#compressing & copying a lot files across the network
#“-C”

put it all together,
$ scp -Cpr DIR/ USER@192.x.x.x:access_media/
WORMHOLE
Wormhole is a Fast, Secure Way to Send Files to Other Users Through the CLI
$ sudo snap install wormhole

$ wormhole send FILENAME.ZIP

#ON THE OTHER COMPUTER DO:
$ wormhole receive codeXYZ
HOW TO COMPRESS A DIRECTORY WITH MAX COMPRESSION.
$ tar -cf - Dir-name/ | xz -9 -c - > Dir-name.tar.xz
#use compression 1 to 9
# "-9e" is even better max compression

#to watch progress bar of the current compression job, open new terminal & run:
$ watch -n30 -x pkill -USR1 -n -x xz
#or "-n1" for every second.

#IF YOU DONT CARE ABOUT COMPRESSION LEVELS AND WANT FASTEST JOB RUN:
$ zip -r Dir-name.zip Dir-name/

#You Can Encrypt Data.Zip With A Password By Passing The -E Option:
$ zip -r -e Dir-name.zip Dir-name/
